|
|
|
|
|
|
|
Do you want to be a better CNC'er in 37 Seconds? Get Better Tool Life, Surface Finish, and Material Removal Rates Fast. It's that easy. You can install and get results now. |
 |
Using Your Mill CAM For the Lathe |
G71/72/73 Are A Poor Man's CAM for the Lathe
As discussed in the introduction to the G71 (Rough Turning) tutorial, these cycles are like a poor man's CAM for the lathe. You come up with the desired end profile, provide a few parameters to determine things like roughing depth, and the cycle makes all the right moves to get the job done. The only real effort is in creating the profile. But, if you have CAM software for milling, you can use it to save time creating that profile. This page works through a simple example of how to accomplish that.
Step 1: Draw Your Profile and Use Your Mill CAM to Generate G-Code For It
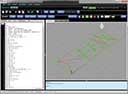
The first step is to draw your profile in a CAD program, import that to your CAM, and generate the g-code for it. Most CAM packages will have a toolpath style that follows a particular path without embellishment. In OneCNC, for example, this toolpath is called "Engraving". I ran off a quick little profile in my Rhino3D, exported it as a DXF, and then imported that into OneCNC where I used the engraving path type to post g-code. It looked like this in OneCNC:
OneCNC engraving toolpath traces the desired lathe profile...
The resultant g-code was pretty typical CAM code:
%
O0000
N10 (PART - )
N20 (FILE - E:\CNC TOOLS\RHINODRAWINGS\TOOLS\CNCCOOKBOOKDIAGRAMS\G71VIAMILLCA)
N30 (AUTHOR - BOB WARFIELD)
N40 (GROUP - TOOLPATH GROUP #1)
N50 (POSTED - MONDAY, AUGUST 22, 2011 22:11)
N60 (CREATED - MONDAY, AUGUST 22, 2011 22:09)
N70 (SYSTEM- ONECNC-XR4 MILL 3D ADVANTAGE - VERSION 20.46)
N80 (NOTES - NONE)
N90 G49
N100 G17 G40
N110 G49
N120 G17 G40
N130 G20
N140 G80
N150 G90
N160 G98
N170 (0.5INCH SPOT DRILL)
N180 T0 M06
N190 S0
N200 M08
N210 G43 H0 D0
N220 G00 X-3. Y2.25 Z0.2
N230 Z0.05
N240 G01 Z-0.1 F1.5 S0
N250 X-2. F3.0
N260 X-1.75 Y1.5
N270 X-0.5
N280 G02 X0. Y1. I0. J-0.5
N290 G01 Y0.
N300 G00 Z0.2
N310 (END TOOL)
N320 M5
N330 M09
N340 M25
N350 M30
%
Our mission is to gut this code and transform it into a usable lathe profile.
Step 2: Delete Everything That Isn't Going to Be Part of the Profile
To begin the process of converting the mill code to a usable lathe profile, the first thing I did was to delete everything that wasn't going to be part of the profile. That means all the code at the beginning to establish a known and safe starting condition, tool changes, feeds, and speeds. I even deleted all the Z moves--we won't use them on the lathe and they're just noise. Here's what I was left with after slashing through the code:
N220 G00 X-3. Y2.25
N240 G01
N250 X-2.
N260 X-1.75 Y1.5
N270 X-0.5
N280 G02 X0. Y1. I0. J-0.5
N290 G01 Y0.
Quite a bit simpler, eh? But it still backplots in the G-Wizard G-Code Simulator/Editor as our familiar profile:
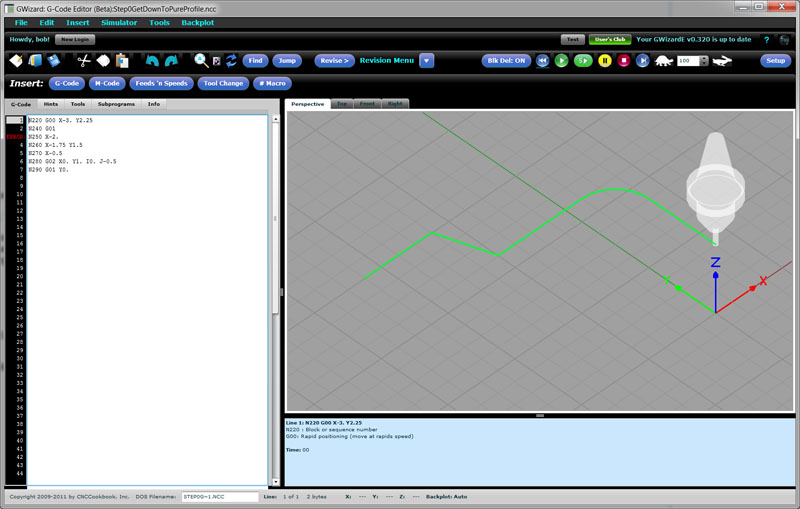
Nice clean profile, but still mill code...
Here is the g-code:
N220 G00 X-3. Y2.25
N240 G01
N250 X-2.
N260 X-1.75 Y1.5
N270 X-0.5
N280 G02 X0. Y1. I0. J-0.5
N290 G01 Y0.
Step 3: Convert IJK Format Arcs to R Format
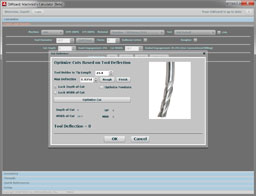
We've got one arc in the profile, a G02 at N280, and it's an IJK format, which means we have relative coordinates in IJK to the circle center. Converting to "R" format means we'll be using a radius instead of IJK and the controller must figure out the center from the endpoints and the radius. That makes the process of switching around which axes do what to lathe format a lot more resilient so it'll potentially require less hand tweaking. If you prefer the IJK format, you can always switch back when we're done.
It's easy to make the switch to "R" format (and back if you like) because GWE has a Revision under the Tools menu that automatically does that. Once we run the revision, we get this code:
N220 G00 X-3. Y2.25
N240 G01
N250 X-2.
N260 X-1.75 Y1.5
N270 X-0.5
N280 G02 X0. Y1. R0.5
N290 G01 Y0.
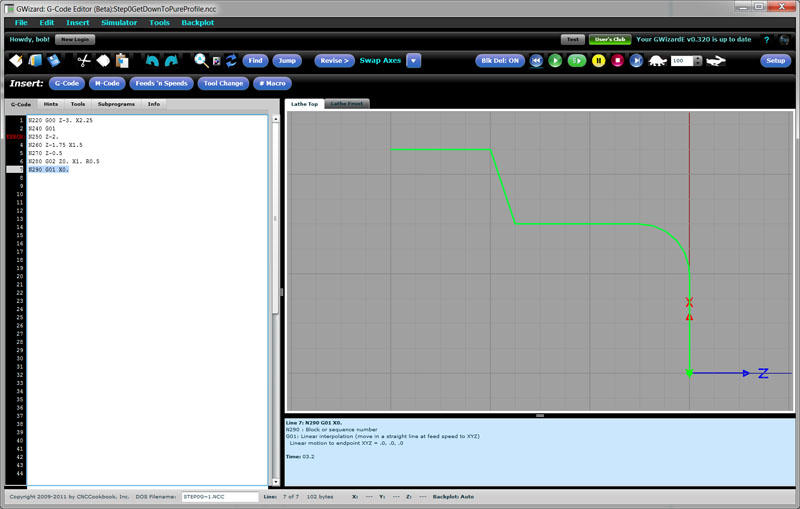
Step 4: Swap "Y" to "Z"
Up to this point I've left G-Wizard Editor in mill mode so I could see what I was doing on the backplot, but we're about to transform all the coordinates from the mill's way of thinking to the lathe's. So, first thing on this step is to swap over to lathe mode in your g-code editor/backplotter. Then you want to switch all the Y's to Z's. The latter is easy to do in GWE as we have a Revision command that can do those sorts of axis swaps.
Here's what you get at this stage:

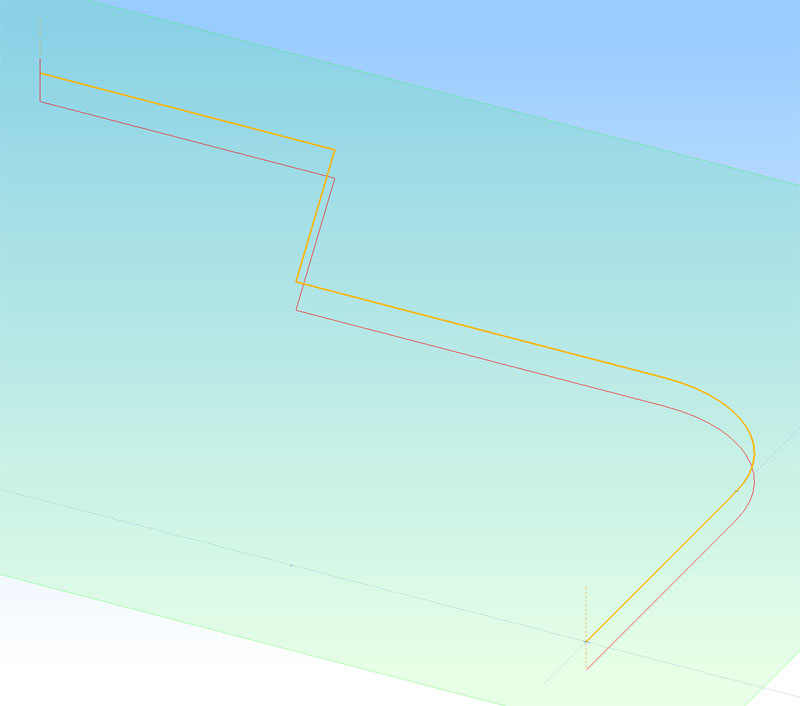
Swapping the Y axis to Z: Starting to look recognizable!
That's actually starting to look recognizable. It's tempting to jump in and change the G02 arc to a G03 so we get the correct convex arc instead of this concave one, but hang in there, that's the wrong thing because we still don't have this thing quite flipped around to the lathe's way of thinking.
Here is the g-code from this stage:
N220 G00 X-3. Z2.25
N240 G01
N250 X-2.
N260 X-1.75 Z1.5
N270 X-0.5
N280 G02 X0. Z1. R0.5
N290 G01 Z0.
Step 5: Swap X to Z and Z to X
Here goes our last trick to finish the profile: we need to swap all the X's to be Z's and all the Z's to be X's. To do this, you'll either need to be really careful, or you need an editor with a command that can make that swap in one shot. If you do it in two passes, say with search and replace, you'll replace X's with Z's, but then you can't tell which Z's to change to X's since some were legit Z's and some used to be X's. G-Wizard Editor has a "Swap Axes" command that makes this sort of thing easy:
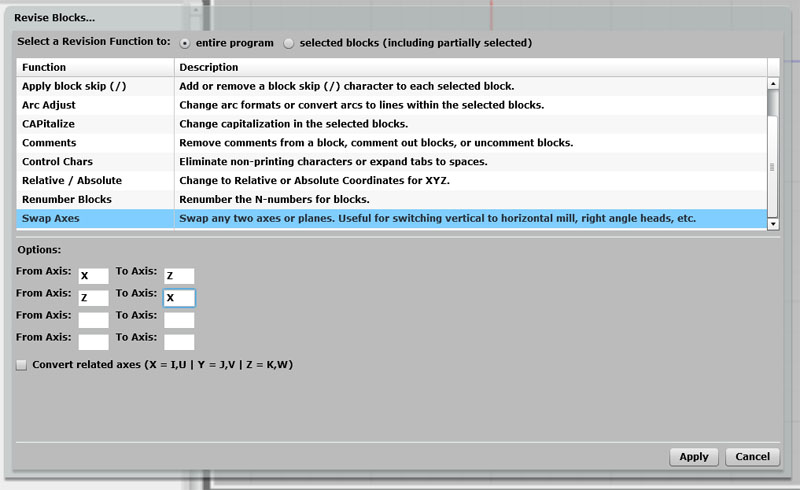
Swap Axes makes short work of changing the X's to Z's and the Z's to X's without getting confused...
Here's the result:
Our familiar profile made the journey from Mill CAM to suitability for a lathe cycle!
That's all there is to it. Here's the g-code:
N220 G00 Z-3. X2.25
N240 G01
N250 Z-2.
N260 Z-1.75 X1.5
N270 Z-0.5
N280 G02 Z0. X1. R0.5
N290 G01 X0.
With surprisingly little effort, most of it automated by a G-Code Editor, our familiar profile successfully made the journey from Mill CAM to being a suitable chunk of code to use as a profile in a lathe cycle. Just cut and paste it into your G71 or other cycle and you are good to go!
This profile was so simple you'd have figured it out faster than you could fire up the Mill CAM, but for more complex profiles you can save considerable time this way.
What About Diameter Mode?
One final thought. A lot of lathes will be set up for g-code that runs in diameter mode, where increments on the X axis are measured as diameter changes not radius changes. Your mill knows nothing of this kind of thinking, so the code coming out of it is radius mode code. You will have gotten this far and then you'll want your profile g-code to be Diameter mode. No worries, GWE has a Revision command that can make that change for you too:
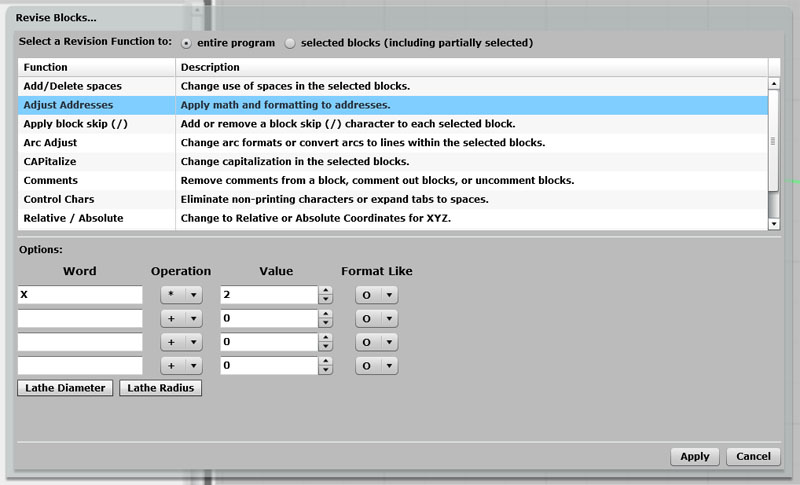
Lathe diameter mode is simple: multiply all the X's by 2...
As you can see, it ain't rocket science--we use the Adjust Addresses Revision to multiply all the X's by 2.
Side Note for Postprocessor Mavens
I have a sneaking suspicion that if you can really make a post sing, there is a way to create a special post for your mill CAM that can crank out a profile in lathe format.
Try the Free Trial Version of G-Wizard G-Code Editor...
![]()
No credit card required--just your name and email.
Next Article: G71 Type II: Rough Turning With "Pockets"
|
Do you want to be a better CNC'er in 37 Seconds? Get Better Tool Life, Surface Finish, and Material Removal Rates Fast. It's that easy. You can install and get results now.

|
||||||||||||||||||
| ||||||||||||||||||